


Mataupu
Iloilo muamua se tagata manua ae e leʻi taunuʻu se fesoasoani
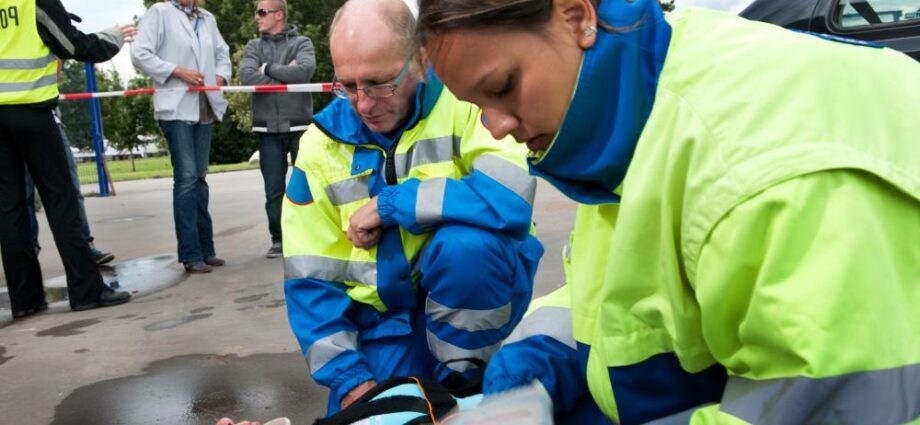
How to properly examine the victim?
While waiting for help to arrive, if the victim’s condition is stable and major problems (bleeding, heart problems, etc.) are being treated, it is important to check whether there are any other minor injuries.
It is imperative to continue to monitor the victim’s condition closely anyway and to always look at the victim’s face to see if they have expressions of pain and to take their vital signs (breathing and pulse) every minute. .
This examination requires checking all parts of the victim’s body. Start at the head and work your way down to the feet, but start at the lower part of the head, the neck, and work your way up to the upper part, the forehead. Warning: the gestures must be gentle.
If the victim is unconscious (see our sheet: unconscious victim)
1- The head: when the victim is lying on his back, first palpate his skull (the part touching the ground), then work his way up to the ears, cheeks, nose and forehead. Check whether the pupils react to light (they should enlarge in the absence of light and shrink in the presence of light) and whether they are even.
2- The back of the neck / shoulders / collarbones: touch the back of the neck, then move up towards the shoulders. Finally, exert light pressure on the collarbones.
3- The bust: examine the back, then go up towards the ribs and press gently on it.
4- The abdomen / stomach: check the lower back, then palpate the abdomen and stomach using “wave” movements (start with the beginning of the wrist, then finish with your fingertips).
5- Hips: exert light pressure on the hips.
6- Arms: move each joint (shoulders, elbows, wrists) and pinch fingernails to check circulation (if the color returns quickly, this is a sign that circulation is good).
7- Legs: feel the thighs, knees, calves and shins, then the ankles. Move each joint (knees and ankles) and pinch toenails to check circulation.
If the victim is conscious (see our file: conscious victim)
Follow the same procedure, but make sure the victim gives you their consent and explain everything you do. Also speak with her to know her impressions.
Faailoga taua
|
Ave le fatuTaking a pulse can be difficult because blood flow and blood vessels can vary from victim to victim. It is important to always take a victim’s pulse using their index and middle fingers. Using the thumb is not effective because you can feel your own pulse in the thumb. Carotid pulse (adult or child) The carotid pulse is taken at the level of the neck, descending in a direct line with the beginning of the jaw, in the hollow located between the muscles of the neck and the larynx. The pulse on the wrist For a conscious adult, it is possible to take the pulse at the wrist, in direct line with the victim’s thumb, about two fingers from the start of the wrist. Brachial pulse (baby) For a baby, the pulse can be taken between the biceps and triceps on the inside of the forearm. |