


Mataupu
Modern apartments are already, as a rule, immediately equipped with heated towel rails at the construction stage. However, residents may not like their characteristics or their indoor location. It may also be necessary to install additional devices, in addition, they can fail, and then the replacement is no longer a whim, but a necessity.
Towel dryers are usually placed in bathrooms or bathrooms, but this is not a dogma, and you can install them anywhere in residential or utility rooms. It all depends on the goals, objectives, resources and even imagination. A heated towel rail is needed not only for drying towels or other fabric products, it also helps to fight excess moisture, which is very important for bathrooms. It also heats the air, although this is not the direct purpose of this device.
A heated towel rail is a heating element consisting of one or more pipe circuits. According to the type of coolant, they are water, electric and combined. In the first type, as the name implies, the coolant is water from the heating system or hot water supply (DHW). Electric ones have either a heating cable (“dry” heated towel rails), or an oily liquid heated by a heating element (“wet”). Combined models are a combination of the first two types. Next, we will tell you how to independently connect each of these devices.
The editors of ” Healthy Food Near Me” draws your attention to the fact that the instructions below are reference material, and such work requires skills and knowledge in plumbing and electrical work. If you are not confident in your abilities, be sure to entrust this work to specialists. In some cases, the involvement of specialists will be necessary.
Step-by-step instructions for connecting an electric heated towel rail
Fautuaga lautele
Connecting an electric heated towel rail is the least expensive and justified if it is not possible to install pipes for a water device or simply there is no desire to do so. The electrical appliance is not fraught with the danger of leakage. However, the opinion that it is enough to screw such a heated towel rail to the wall and plug it into an outlet is very erroneous.
Mea e manaʻomia
To install an electric heated towel rail you will need:
- Hammer drill or powerful drill
- Screwdriver or screwdriver
- Folau
- pule
- Tulaga o
- Penitala po'o se maka
Installation and wiring should be carried out exclusively by specialists and is not the subject of this article.
Filifilia o se nofoaga mo le faʻapipiʻiina
- The installation of an electric heated towel rail requires unconditional compliance with electrical safety rules, so its arbitrary placement is unacceptable. If we are talking about a living space, for example, a room, then the requirements are less stringent, and in the case of a bathroom or kitchen, they are very unambiguous.
- An electric heated towel rail must be reliably protected from moisture; it must not be installed in close proximity to a water source.
- A number of manufacturers give the following recommended minimum distances: 0.6 m from the edge of the bathtub, washbasin or shower cabin, 0.2 m from the floor, 0.15 m each from the ceiling and walls.
- The appliance must be installed in close proximity to an electrical outlet. It is forbidden to extend the wire that comes with the device, as well as to use various extension cords.
Soʻotaga fesoʻotaʻiga
- The electric towel warmer can be connected either to an electrical outlet or to a switchboard using a three-wire cable.
- If we are talking about the bathroom, then the socket or shield must be installed at a distance of at least 25 cm from the floor.
- Make sure that the socket or shield is connected through an RCD (residual current device) and has a ground.
- Only hidden insulated wiring is allowed, especially when it comes to the bathroom.
- Do not install the appliance under an electrical outlet. The socket should be located on the side or below at a distance of 20-30 cm from the heated towel rail.
- Operation of the appliance in the bathroom or kitchen is only possible with a moisture-proof socket. Such an outlet goes deep into the wall, and a special cover is made on it to prevent water from entering.
oʻo
- Make sure that when installing the heated towel rail, all of the above requirements can be met.
- Before starting the installation, turn on the device in the network and make sure that it works.
- Attach the brackets to the heated towel rail.
- Attach the device with brackets to the wall, check the evenness of its location in the horizontal plane by level.
- Make the necessary markings on the wall with a pencil or felt-tip pen and drill holes.
- Install the dowels and attach the device to the wall.
Step-by-step instructions for connecting a water heated towel rail
Fautuaga lautele
- All necessary measurements, the purchase of spare parts, adapters, couplings and other parts must be made strictly before the start of work.
- Connection to the heating system in many cases is impossible without the participation of specialists. The fact is that when installing a water heated towel rail (as well as dismantling old equipment), it is necessary to completely shut off the hot water supply in the system, and this cannot always be done on your own.
- All threaded connections must be sealed with linen or plumbing thread; excessive force must not be used when tightening the connections.
- Any water circuit (a heated towel rail is no exception) is a risk of leakage. Some insurance companies claim that the amount of damage to property from leaks exceeds losses from burglaries. We recommend installing a leak protection system – it will automatically “detect” a leak and, if necessary, shut off the water supply.
- Before starting work, before cutting into a riser or main pipe, it is recommended to make a “rough” installation in order to understand that all parts are compatible with each other. The principle of “measure a hundred times” is fundamental here.
- Before marking the wall and drilling holes for the brackets, a “rough” installation is also recommended in order to understand exactly how the heated towel rail will be located and where exactly the holes need to be drilled.
Mea e manaʻomia
To work, you will need the following tools (the list is not exhaustive):
- Hacksaw
- Bulgarian
- Maliu
- Gas and adjustable wrenches or plumbing pliers
- Hammer drill or powerful drill with concrete and tile drills
- Screwdriver with Phillips and slotted bits or screwdrivers
- Scissors for cutting polypropylene pipes
- Soldering iron for polypropylene pipes
- Failautusi
- Folau
- Tulaga o
- Roulette
- Penitala po'o se maka
- Tow, plumbing thread and plumbing paste.
Before starting installation, make sure that you have purchased all the necessary adapters, couplings, bends, stopcocks, fasteners and other spare parts.
Selecting a connection method
- The heated towel rail is connected either to the DHW system or to the central heating system, becoming part of it.
- Connecting to the DHW system is easier to do on your own. In this case, the device is connected in series or in parallel, which may ultimately affect the pressure and temperature of hot water. When connected in series, it will only work when hot water is used.
- Connection to the central heating system. With this type of connection, the new device is installed, as a rule, in parallel with the central heating pipe using threaded connections and taps, and much less often – welding.
Dismantling of old equipment
- If the old heated towel rail forms a single structure with the riser, then it is cut off by a grinder. When cutting, keep in mind that the remaining parts of the pipes must be long enough so that they can be threaded (if you plan to use a threaded connection).
- If the device is on a threaded connection, then it must be carefully unscrewed. In both the first and second cases, it is first necessary to completely shut off the water in the riser (contact the management company for clarification).
- If there are ball valves at the inlet and outlet of the heated towel rail, then it is not necessary to turn off the water in the riser – turn off the inlet and outlet taps. Then carefully disconnect the screw connections or cut off the heated towel rail. Remember that if you do not have a bypass installed (a jumper in front of the inlet and outlet pipes of the heated towel rail), then by shutting off the inlet and outlet taps, you will actually block the riser. If you are unsure of your actions, be sure to contact the management company.
- Next, the old device must be removed or cut from the brackets.
Installation of a new heated towel rail on the old seats
- Perform a “rough” installation of the heated towel rail and mark the brackets for it on the wall, paying special attention to the evenness of the device horizontally.
- Remove the heated towel rail and drill holes with a puncher or drill, insert dowels into them.
- If the location of the inlet and outlet pipes of the new heated towel rail coincides with their location on the dismantled one, then connect them to the outlets from the riser using threaded connections. We recommend using threaded connections because of their good maintainability.
- If the old heated towel rail was welded on, and you want to put the new one on a threaded connection, it is necessary to cut pipe threads on the outlets from the riser.
- When the connection of the nozzles of the heated towel rail with the outlets from the riser is completed, firmly pull the device to the wall.
New connections, pipe welding and marking for brackets
- If you are installing from scratch or the parameters of the new heated towel rail differ from the old one, first cut the riser to the required height. The height must be calculated taking into account the lengths of the couplings and adapters with which the inlet and outlet pipes of the heated towel rail will be connected to the riser.
- Currently, polypropylene pipes have become widespread in plumbing, and it is their plumbers who recommend using them because of the relative ease of installation and reliability. Such pipes are connected to taps or iron pipes using couplings, and between themselves – straight and angle fittings using a special soldering iron (recommended temperature – 250-280 ° C). However, you can use regular steel pipes.
- When calculating the position of the inlet and outlet pipes, proceed from the fact that they must be even, without humps and bends (they negatively affect water circulation), and also have a slope of at least 3 mm per meter.
- It is recommended to install the heated towel rail as close as possible to the riser or main pipe to minimize heat loss. Installation at a distance of more than two meters is impractical.
- Perform a “rough” installation to understand exactly where you need to mark the holes for the fasteners.
- Mark the wall, drill holes and insert dowels into them. Pay special attention to the fact that the device must be located in a horizontal plane.
Installation of bypass, ball valves and Mayevsky crane
- Bypass is a jumper in front of the inlet and outlet pipes of the heated towel rail. It is placed in front of the ball valves, which are installed directly on the nozzles of the heated towel rail. This solution allows you to block the flow of water into the heated towel rail, without disturbing the operation of the riser itself. Installation of inlet and outlet taps without a bypass is highly discouraged, as it may disrupt the operation of the heating system.
- The bypass is welded or screwed to a riser or main pipe; threaded “tees” are well suited for a threaded connection. It is recommended that the bypass pipe diameter be smaller than the main pipe diameter.
- The diameter of the ball valves at the inlet and outlet must match the diameter of the nozzles of the heated towel rail. In addition to ball valves, screw valves can also be used to regulate the amount of incoming water.
- A useful addition to the heated towel rail circuit is the Mayevsky faucet. It is mounted in the upper part of the device (for example, in front of the upper ball valve) and serves to remove excess air from the system. Air locks prevent the circulation of water and, as a result, the normal heating of the device.
- When all connections are made, the heated towel rail must be fixed to the wall.
Selecting a connection scheme option
An important role is played by the connection scheme. There are three main types of connection: side, bottom, diagonal. The choice of scheme largely depends on the model of the device, as well as on how the pipes were originally laid in the room. The fact is that too many adapters significantly increase the risk of leakage, and each additional bend impairs water circulation.
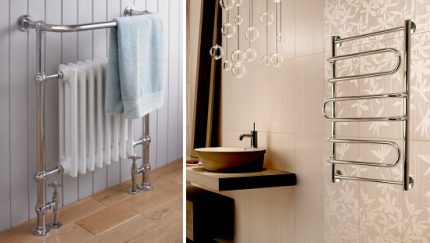
The side option is the most common for “snakes”, M- and U-shaped heated towel rails, in which the connection to the water supply is located on the side. For “ladders” choose a diagonal, side or bottom connection.
Features of connecting a combined heated towel rail
The combined heated towel rail is made according to the “two in one” principle: it consists of a water section and an electric one. This type of heated towel rail is very convenient: you do not depend on the presence of hot water in the pipes, pressure, etc. This is especially true if the electrical and water sections of the device are completely autonomous.
Such heated towel rails are expensive, moreover, the requirements and connection algorithms that are typical for both electric and water apparatus are fully applicable to them. Experts recommend adhering to the following sequence of work:
- First, all work related to the connection to the heating system or hot water, described in the chapter on water heated towel rails, is carried out.
- After a complete check of the operability and safety of the water connection, it is necessary to proceed with the wiring.
Tomai Faapitoa
Healthy Food Near Me turned to the leading engineer Yuri Epifanov with a request to clarify some difficult points when choosing and installing heated towel rails, as well as answer popular questions.
The type of heated towel rail is a key parameter with which to start choosing. If your room has already been connected to a heated towel rail, or if it is easy to do, then it is most reasonable to connect a water model. If the production of an eyeliner is expensive (for example, a riser or a main pipe is built into the wall), then the electric model is your choice. Doing the necessary electrical work in this case is clearly the lesser of evils.
Manufacturers of electric towel warmers often indicate the power consumption of the device, while the actual heating power may be lower.
It is also necessary to take into account other design features. For example, whether the heated towel rail will be stationary or with moving sections. If you need the second option, it is recommended to choose an electric model.
Based on how pipes are located in your room, you can opt for a wall or floor model. Finally, you need to decide on the shape and size. The size is selected based on the dimensions of the room, and the shape (“snake”, “ladder”, U, M, E) is more a matter of convenience and taste. But the larger the size and the higher the frequency of pipes or bends of one pipe, the more heat the device will give off (this is more true for water and combined models).
In terms of the material of manufacture, towel warmers made of stainless steel, copper and brass have proven themselves best. You should try to choose the model in which the pipes are made without longitudinal seams (they can be seen if you look inside the pipe). The optimal thickness of the pipe walls is from 2 mm. Before buying, you need to carefully examine the product itself: the welds must be even, the bends must be smooth, without deformation.
Fesili ma tali lauiloa
Where is the best place to install a heated towel rail in the bathroom?
As a rule, recommendations can be formulated as follows: the position of the device should be based on the convenience of connecting to pipes, the electrical network, not interfere with the use of other objects in the room and be convenient for use. However, many bathrooms are small, and either comfort or space must be sacrificed.
Quite often, heated towel rails are hung over washing machines. Here you should also remember about the indentation of 60 cm, and if you have a machine with laundry loading from above, then you need to position the heater so that it does not interfere with the operation of the machine. Of particular note are the requirements for electric heated towel rails: they must always be strictly observed.
What are the typical mistakes when connecting a heated towel rail with your own hands?
– A very common mistake that occurs when installing water heated towel rails is the installation of taps on the inlet and outlet pipes without a bypass. This is fraught with the fact that by turning off the heated towel rail, you actually paralyze the operation of the heating or hot water system.
– Non-compliance with the levels of the inlets and nozzles of the heated towel rail is very common. Recall that the point of connection of the inlet pipe with the riser must be above the point of entry into the heated towel rail, the outlet pipe must be connected to the riser below the point of exit from the heated towel rail. The result of such an error is the difficulty in the movement of water.
— Use of pipes with bends. The result is the formation of air pockets.
— Replacement of inlet and outlet pipes in some places. This is difficult to imagine with side mounting, but in the case of bottom mounting, in the absence of due care, it is quite.
– A significant difference in the diameters of the heated towel rail pipes, inlets, outlets and riser. The result is an uneven movement of water along the contour.